Custom timeframe
Set a Custom Timeframe
The timeframes selection feature allows you to define a specific time period for viewing data or performing various actions, such as creating segments. This feature is particularly useful for isolating and analyzing specific periods of time, like a particular month or year.
To utilize the timeframes selection feature, follow these steps:
-
On most pages, select your desired time period from the dropdown menu at the top:

-
For report pages, you can find the same feature on the left:

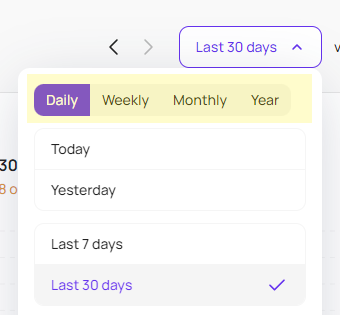
To change the timeframe, click the button to reveal the dropdown menu, where you can choose between preset or custom timeframes.
Timeframe Presets
Preset time periods are predefined intervals commonly used in the timeframes selection feature. These presets enable you to quickly and conveniently select a specific time period without the need to manually enter dates.

Some examples of common preset time periods include:
- Today: The current day.
- Yesterday: The previous day.
- Last 7 Days, Last 30 Days, and Last 12 Months: Previous days or months starting from yesterday.
- Month to Date: The current month up to yesterday.
- Last Month: The previous month.
- Year to Date: The current year up to yesterday.
To ensure accurate data comparison, when selecting Last XX Days or XX to Date, the current day is excluded.
If you want to include the current day in the presets, you can edit your profile settings and select the option.
Custom Timeframe
If you need to view data for a specific event or time period not covered by the preset options, use the Custom timeframe option.
Follow these steps:
-
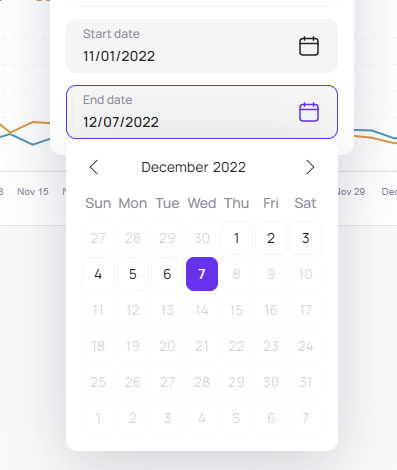
Click on the dropdown menu, and at the top right, you will find the Start and End date, at the bottom the calendar selection:
-
First, select the start date by navigating the calendar, then choose the end date in the same way:
Please note that some pages may have limitations. For instance, the transaction report page is limited to displaying data for up to 3 months from the start date to the end date.
Timeframe Navigation
On the Overview pages, you can use the selected timeframe as a form of pagination. For example, if you've selected Today and click the left arrow, Yesterday will be chosen. Clicking again will take you to the day before, and so on.
To the left of the timeframe selection, click on the left or right arrows to page through the timeframe:
## Time UnitThis feature is available exclusively for charts and allows you to select a specific time unit, such as daily, weekly, monthly, or yearly.
To choose a time unit, follow these steps:
-
Click on the dropdown menu and select the desired time unit:
-
If your selected timeframe is greater than 3 months, the unit will automatically switch from Daily to Monthly.